
We spend so much time talking about how to apply fake tan that we sometimes forget one of the most important parts of the routine:
If you've ever applied fresh tan over old colour, you'll know how quickly it can turn into a cycle of uneven patches, darker elbows and stubborn areas that just won't budge.
A proper tan removal routine gives your skin the fresh start it needs before your next glow.
Here's how to remove fake tan properly and reset your skin without making the process unnecessarily harsh.
When Should You Remove Your Fake Tan?
There's no need to remove your tan simply because a few days have passed.
Instead, look at how your colour is fading.
If your tan has become noticeably patchy, you're seeing build-up around your hands and feet, or you're preparing for a completely fresh application, it's probably time for a reset.
The goal isn't to remove every tiny trace of colour immediately.
It's to create a cleaner, more even base for your next application.
Step 1: Soften the Skin
Before trying to remove stubborn tan, let warm water help soften the skin.
A warm shower or bath can make the removal process more comfortable and help loosen old product.
You don't need to attack your skin with an aggressive scrub.
In fact, harsh scrubbing can leave your skin feeling dry and uncomfortable – exactly what you don't want before applying fresh tan.
Step 2: Use a Dedicated Tan Remover
This is where a dedicated tan-removing product can make a difference.
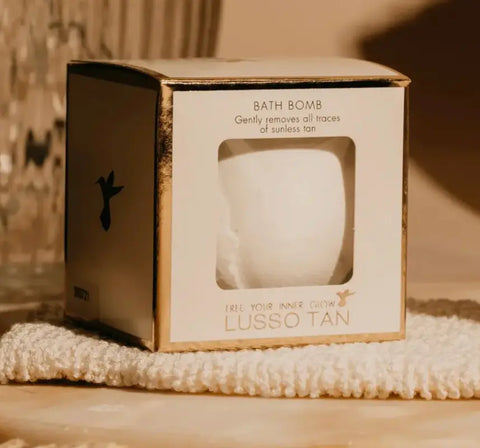
Lusso Tan Fresh Lux Tan Removing Shower Gel or Tan removing bath bomb is designed to help break down old tan and build-up while helping leave the skin feeling soft rather than stripped. It's part of Lusso's three-step approach of removing, prepping and tanning.
Simply apply it in the shower and allow it to work on areas where old tan has built up.
For particularly stubborn areas, you can gently work the product into the skin rather than immediately reaching for aggressive scrubbing.
Step 3: Pay Attention to Tan Hotspots
Some areas always seem to hold onto fake tan longer than others.
We're talking:
Elbows.
Knees.
Ankles.
Wrists.
Hands.
Feet.
These areas can naturally be drier, which means old tan can cling to them.
Give these areas a little extra attention when removing your tan, but remember that gentle is usually better than aggressively scrubbing until your skin feels sore.
Step 4: Exfoliate When Needed
Once you've softened the skin and removed as much old tan as possible, gentle exfoliation can help smooth away remaining dry skin.
Lusso Tan's Exfoliating Mitt is designed to help buff away dry skin and prepare the skin for your next tanning application.
The key word is gentle.
Your goal is smooth, comfortable skin – not red or irritated skin.
Step 5: Give Your Skin Some TLC
Once your old tan has been removed, don't immediately jump straight into applying another layer.
Take a moment to hydrate your skin.
Moisturise and allow your skin to feel comfortable before your next tanning session.
If you're tanning later that day, make sure your skin is clean and properly prepared before application.
This is also where a product like Lusso Tan PH Balancing Primer can become part of your routine, helping cleanse and hydrate the skin before tanning.
Why Is Removing Old Tan So Important?
Imagine painting a wall without preparing the surface underneath.
You might get away with it for a while, but eventually the uneven base starts to show.
Fake tan is similar.
When you continually layer new colour over old, fading tan, you can end up with areas that develop differently.
A proper reset gives you a much cleaner starting point.
That's why Lusso's Tan Reset System brings together tan removal, skin preparation and tanning as one complete routine.
How Often Should You Completely Reset Your Tan?
There's no universal schedule.
It depends on how quickly your tan fades, how often you apply self tan and how your skin behaves.
Instead of automatically removing your tan every few days, look at your skin.
If your colour is still even and you're happy with it, maintain it.
If it's becoming patchy or you're preparing for a fresh application, it's time for a reset.
Your Lusso Tan Reset Routine
1. Remove
Break down old tan and build-up.
2. Exfoliate
Gently smooth away dry skin where needed.
3. Hydrate
Give your skin some TLC.
4. Prime
Prepare your skin before fresh tan.
5. Tan
Apply your chosen Lusso formula evenly.
6. Maintain
Moisturise and look after your glow.
Because a flawless tan doesn't start with the bottle of tan.
It starts with the skin underneath it.
Ready for your next glow? Discover the Lusso Tan Reset System at LussoTan.com.
